I recently worked on a project with children in two lovely primary schools close to Aberystwyth in West Wales: Penrhyncoch, and Penllwyn. The project was funded by the Arts Council of Wales through the Lead Creative Schools (LCS) scheme. The scheme aims to break the mould in the way that the children learn by breaking out of the classroom and the normal structures of school days to approach a project in different ways. If you’re interested in learning more about the way that the scheme tries to do this then please have a look at the link above and the handbook that goes with the LCS scheme. In general LCS schemes are aimed at “Creative Practitioners” who are able to go in to schools to lead the children and teachers through a project. The word “creative” is often perceived to mean “artistic”… this is not correct. Engineering of all kinds is as creative as painting or sculpture or any other activity that exists in human endeavour. This was one of the reasons for my wanting to get involved as I think that creativity is often seen through an artistic filter of “flair”, whereas the reality (as many artists will describe) is that in order to be creative you need to understand the “nuts and bolts” of tools and techniques before you can truly make the most of any “flair” that you have. Anyway, enough of that! Who were we and what was my part in it?
The Team:
The projects at the two schools were distinct and had different but overlapping teams although my technical part of the project was very similar in the two schools. The projects were overseen by Alice Briggs, and at Penrhyncoch Laura Denning, Rosa Carless and I worked with the year 5/6 class teacher Lynwen Evans. At Penllwyn Milly Jackdaw, Rosa and I worked with the year 3/4 class teacher Emma Parr-Davies.
Laura is an artist who primarily works with video and sound, and is interested in water in all its forms. Rosa is a dancer (and she can spin on her head, how cool is that!) who teaches yoga and street dance in various guises. Milly is a storyteller who runs all sorts of different activities (see her website for details). Alice is an artist who works in various media and places including schools and old people’s homes and organised us (cat herding anyone?).
I am not going to try to capture all of how we worked together, but essentially we ran activities one day per week in each school and interleaved with each other whilst trying to keep a common theme between our different approaches. My role was in helping the children to put together spheres that we could float down the river taking images, recording audio and transmitting their locations as they progressed. The majority of the rest of this post will be about the technology that we used to do this.
The Idea:
My idea was to provide a technical element to the projects which were about the rivers/streams that were local to the schools that could tie up with the activities that the other practitioners were doing with the children. The route that I chose was to get the children to put together a cheap system to take images and video as it floated down the river.
The Cameras:
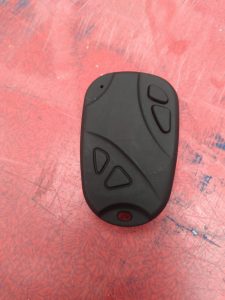
I didn’t want to use expensive off-the-shelf cameras (like Go Pros) because a) they are expensive and b) they are boring because they just work. So to make life interesting I decieded that following on from a project that I did a while ago with Adam Buick (with lots of help from Pete Todd) we would use “hacked” 808 keychain cameras that can be bought on Ebay for a couple of pounds (the cheapest that I bought were ~$4 each).
So these were the cameras:
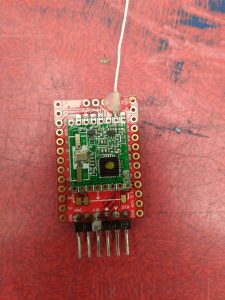
And if you take the case off they look like this:
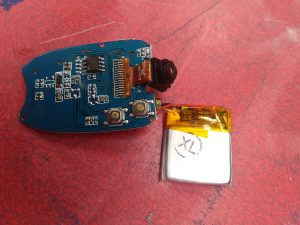
And with the transistors soldered to the switches (emitters towards the edge of the board):

There are a lot of different varieties of this type of camera, some good, some bad. They all work in more or less the same way. They have an internal battery (of variable quality), two buttons to control them, a microphone (of variable quality) and a uSD card slot. The two buttons are pressed in fixed sequences to turn the camera on and off and to take still images and video. What we did was to solder transistors (BC109’s because I had alot of them in a box and they do most jobs) across the switches which meant that we could then easily use an external microcontroller to “press switches” for us. You can do this in other ways as well: Pete worked out that you could do it with direct connections and setting the pins to high-Z, high and low in various ways, but it only seemed to work on some of the cameras, whereas the ugly transistor hack worked on every camera that I tried it on (3 different types). There should really be a current-limiting resistor between the IO pin of the microcontroller and the base of the transistor, but there was nowhere easy to hot glue it to, and ATMega328P-AUs and BC109’s are both fairly bomb-proof, so I didn’t bother.
The Microcontrollers:
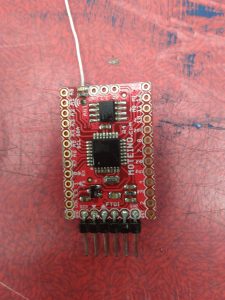
I stuck with Arduino-based kit for the microcontrollers: we did a bit of testing with Arduino UNOs so that the children could plug jumper wires in to the Arduino and get the idea that we were building a circuit between the two devices. I had intended to do much more “hands-on” electronics type stuff, and we did do some, but there is never as much time as you need, and going off at tangents is an important part of any project like this I think. We did have one exciting moment when the magic smoke started to come out of a wire that had been experimented with and resulted in a short-circuit on a recycled Lithium-ion 18650: it turns out that even very knackered laptop batteries still have some cells with significant current delivery capabilities. It entertained the kids anyway. Not so much Lynwen who was opening windows to try to stop the fire alarm from going off. All good clean fun. Anyway, after a bit of experimenting with UNOs we switched to one of my favourite arduino compatible boards: the Moteino. Moteinos are basicaly small form-factor wireless Arduinos. The ones we used had 433MHz RFM69HW radio transceivers, and were used to do all of the following:
- Take images and/or video at various frequencies by pressing the buttons on the cameras via the transistors.
- Collect data from a GPS module through a serial connection. I used TinyGPS++ for this.
- Transmit the GPS data using the RFM so that we had some chance of finding them.
We built-up these different bits of functionality one at a time and then I combined them all together for the finished article (again, I’d hoped to get the children to do more of this but we spent too much time doing other fun things together).
Along the way we did lots of fun activities, but my favourite was probably the day we spent playing with latitude and longitude in Google Maps, and then playing hide-and-seek with the systems. One of us “hid” them around the school grounds and then we used a radio receiver (another Moteino) plugged into my laptop to receive the positions that were being relayed from the GPS modules. Then the children typed the coordinates into Google Maps on an iPad and used it to track them down and retrieve them. It worked surprisingly well and gave us an excuse to talk about satellites, rockets, the solar system and other cool stuff. It was just after the first launch of Falcon Heavy, so lucky timing.
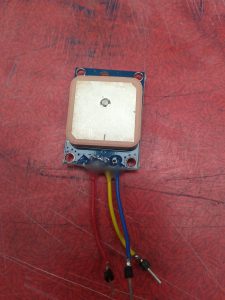
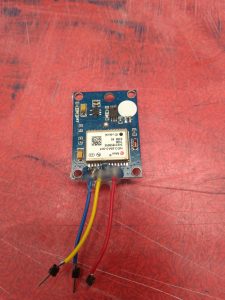
The GPS Modules:
We used the ubiquitous UBlox NEO6 modules that are cheap and easily available on Ebay. They are a little power hungry, but that didn’t really matter for this as we were using old 18650 laptop cells which (even when unusable for a laptop) still have over 1000mAh of capacity at 3.7V.
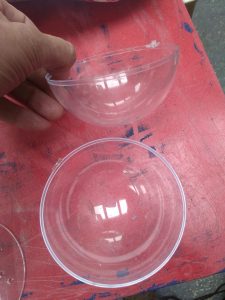
The Case:
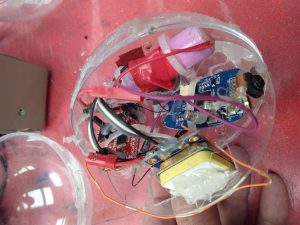
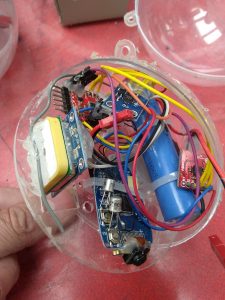
For the enclosure we needed something cheap, strong, transparent and easily available. Early on I had decided to use acrylic spheres that are more usually filled with sweets and hung from Christmas trees. Again, I found them on Ebay in packs of ten for less than £1 each. I bought a few to mess around with and decided that they would do the job. They did, but only barely. They are a bit of a fiddle to fit together when full of electronics, and although quite strong, they don’t always survive when bouncing down a rocky stream-bed. Small cracks can let the water in… which is not so good for the electronics or the general floatiness. In short they sometimes sink. Having said that, I only actually lost one of the eight that we put together. I suspect that it sank, but it may just have failed for some other reason that caused it to stop transmitting. I suspect that we will never know. We used silicone sealant when assembling them, and had to leave them to cure for an hour or so before using them. I dropped a few silica beads into each one as my earlier experiments had shown that condensation forms when the are placed in cold water.
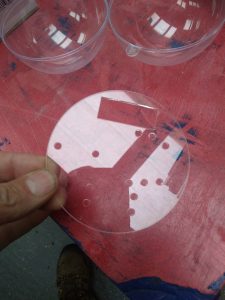
We cut out a circular mounting plate on a laser cutter (thanks Aberystwyth Univeristy and Tom Blanchard). These discs were used to attach all the components to, and to make it easier to assemble the spheres. They also lent some rigidity to the spheres during assembly. A lump of old roofing lead was also glued to the bottom of the plate to make them float with the camera pointing in a sensible direction (this took a bit of trial and error to get the right amount of weight).
THE WHOLE THING:
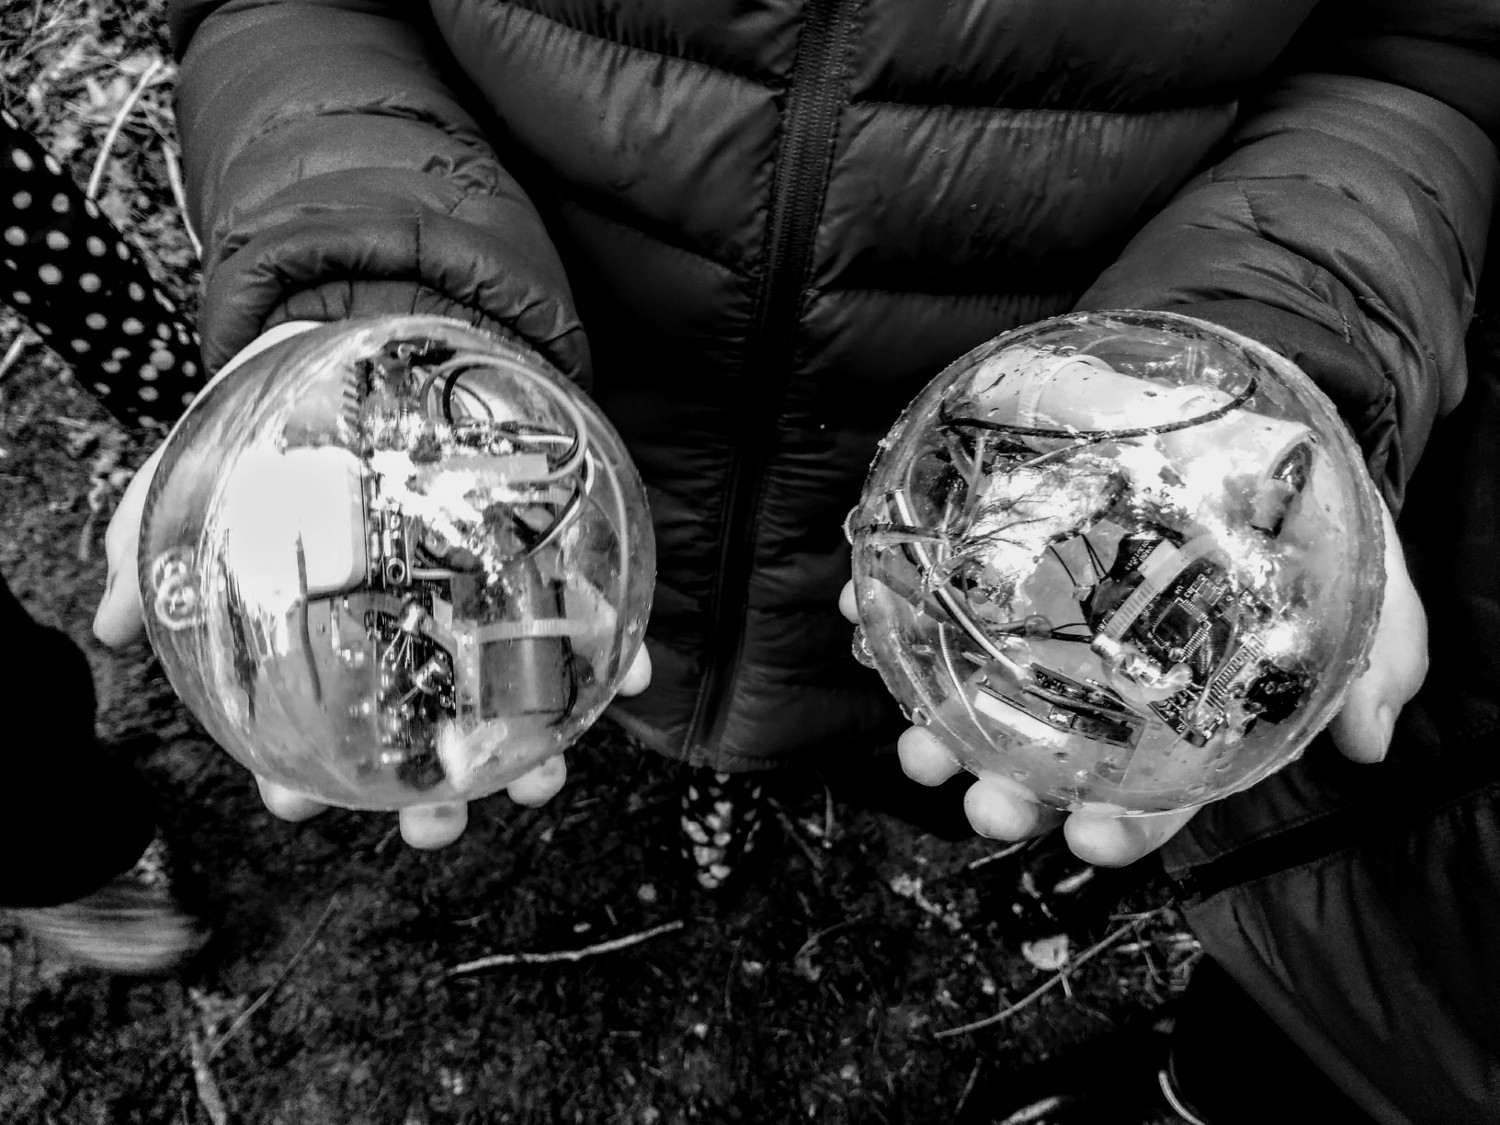
When all the bits were put together, we went and played at the rivers near the schools and captured images and videos. Much fun was had, and some of the best responses from the children were during these days. I had a fantastic time, and it was great to see some of the less confident and quieter children in a class room come into their own when standing in a cold wet stream with wellies full of water. It also reminded me of how beautiful this part of the world is, and how I have come to take it for granted somewhat in recent years.
They were beautiful conglomerations of hot-glue, wire and components:
Pictures and videos:
So we used the spheres on 4 occasions (twice with each school). We had a “test and play” day first, and then a “wave goodbye” launch afterwards. Both of the testing days went really well from the point of view of what the children got out of them: we repeatedly launched and recovered the spheres and generally worked well as teams. The light levels were very low on the test day with Penrhyncoch because it was cloudy and we were inside a wooded area, so lots of the images were dark and/or blurry, but still some nice pictures appeared. The launches for the longer trips were also rather different: the stream at Penrhyncoch was very low due to the very hard frosts locking all the water up in the snow and ice.
Some short clips from Penllwyn’s practice day:
There’s a longer compilation from the first part of the Penllwyn testing day here (on Vimeo).
My favourite video was an accident caused by a broken wire in one of the spheres that got stuck on a rock. It is just the view from the sphere as it gets stuck, and then about ten minutes of the river bank and the sound of the water flowing past, the occasional snowflake and a bird or two. Very peaceful. Click here (on Vimeo).
There is also a video that I put together from 20 second clips of the long (~6km?) trip that the spheres from Penllwyn made down the Rheidol. Tom and I followed along in my kayak to prod them when they got stuck: quite hard work in places but a nice way to spend a day at work. Video COMING SOON!
Some pictures of the activities:
Photos COMING SOON.